Printable Guide
Free Printable Gift Tags: How to Make Custom Ones at Home in Seconds
Learn how to make free printable gift tags at home — 6 shapes, custom text, print-ready PDF. No account, no watermarks, no design skills needed.
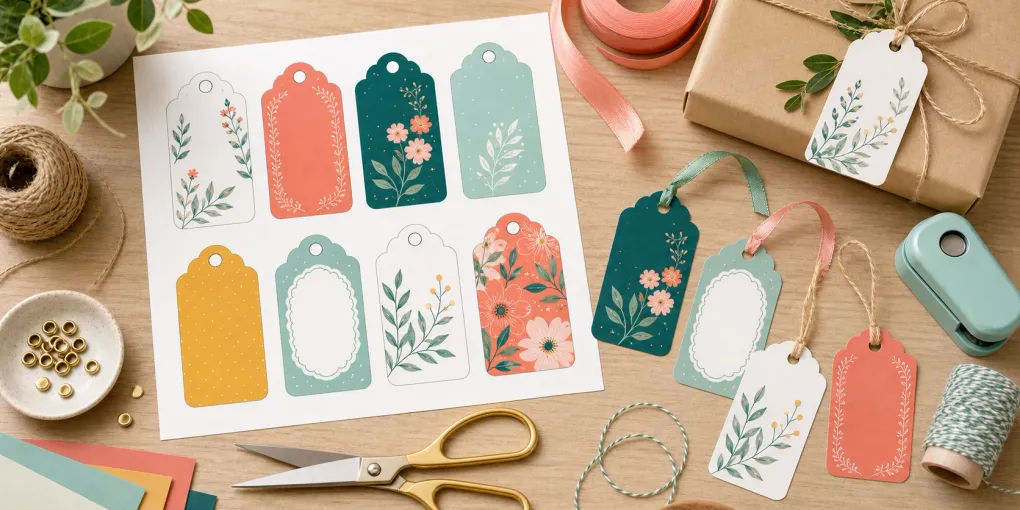
Store-bought gift tags cost money, run out at the worst moment, and come in shapes you didn’t want. Printable gift tags solve all three problems — but only if you can actually make them without spending 45 minutes in Canva.
This guide shows you exactly how to make free printable gift tags at home: which tools to use, what paper to buy, how to set up your printer, and how to finish the tags so they look like you bought them from a boutique.
Why Printable Gift Tags Are Better Than Store-Bought
The obvious answer is cost. A sheet of 6 custom printable gift tags costs you a few cents of paper and ink. A bag of 20 generic store tags costs $4–6 and still won’t have the recipient’s name on them.
But the real advantage is control. With printable gift tags you choose:
- The exact text (full name, nickname, inside joke — whatever fits the moment)
- The shape (rectangle for lots of text, heart for Valentine’s Day, circle for a minimal look)
- The color (match your wrapping paper, the birthday person’s favorite color, or your brand palette if you’re gifting for a small business)
- How many tags to print — 4, 6, 8, or 12 on a single sheet
Once you have a printable gift tag generator bookmarked, making a tag takes less time than finding the scissors.
What You Need to Make Printable Gift Tags at Home
Before you start, gather these supplies:
Paper The single biggest factor in how professional your tags look is paper weight. Regular 80 gsm printer paper works, but the tags feel flimsy and the ribbon hole tears easily.
- Recommended: 160–200 gsm cardstock. Most home printers handle it without jamming. Tags are stiff, hold their shape, and survive being tied onto a gift.
- Budget option: 120 gsm paper is a good middle ground — stiffer than regular paper, cheaper than full cardstock.
- For reusable tags: Laminate 160 gsm cardstock after printing. The lamination makes colors pop and the tag survives multiple trips through gift drawers.
Tools
- A printer (inkjet or laser — both work fine)
- A paper cutter or scissors (a guillotine-style paper cutter gives cleaner cuts)
- A hole punch — 6 mm (¼ inch) size is standard for gift tags
- Ribbon, twine, or thin string, 3–5 mm wide
Optional but nice
- A bone folder for crisp folds if you’re making folded tags
- A corner rounder punch if you want perfectly rounded corners on rectangle tags
How to Make Free Printable Gift Tags with PrintMigo
PrintMigo’s free gift tag generator lets you design, preview, and download printable gift tags without signing up or paying anything. Here’s the full process:
Step 1: Enter Your Text
Open the generator and fill in three fields:
- To — the recipient’s name
- From — your name or family name
- Message — optional. Works well for short lines like “Happy Birthday!”, “With love”, or “Thank you”. Keep it under 30 characters so it fits cleanly on the tag.
The live preview updates as you type, so you can see exactly how the text will look before you download.
Step 2: Choose a Shape
Six shapes are available:
| Shape | Best for |
|---|---|
| Rectangle | Longest text, most traditional look |
| Rounded | Same as rectangle but softer — works for almost any occasion |
| Circle | Short text, modern minimal look |
| Heart | Valentine’s Day, anniversaries, “thank you” tags |
| Star | Kids’ gifts, birthdays, festive occasions |
| Oval | Wedding favors, baby showers, elegant gifts |
Switch between shapes with one click — the preview updates instantly.
Step 3: Pick a Style and Color
Four styles are available (Classic, Modern, Festive, Minimal). For most occasions, Classic or Minimal look the most polished when printed.
For color, use the color picker to choose any background color. A few practical tips:
- Light backgrounds (pastels, white, cream) print most accurately on both inkjet and laser printers.
- Dark backgrounds use more ink and may look slightly different on paper than on screen, especially on inkjet. Do a test print before running a full sheet.
- The text color adjusts automatically — dark backgrounds get white text, light backgrounds get dark text.
Step 4: Set Tags Per Page and Download
Choose how many tags to print per page: 4, 6, 8, or 12. Six tags per page is the best balance of size and efficiency for most purposes.
Toggle Include ribbon hole on if you want a printed dot marking where to punch your hole. Then click Download PDF for the print-ready file.
Printing Tips for the Best Results
Even with a great design, poor print settings can ruin the final tags. Here’s how to avoid the most common problems.
Paper Settings
When you load cardstock into your printer, check two settings:
- Media type — Set this to “Cardstock” or “Thick paper” in your printer’s settings. This slows the feed rollers slightly and prevents the sheet from jamming or skewing.
- Print quality — Set to “Best” or “High”. Draft mode prints fewer ink passes, which shows up as streaks or uneven color on tags.
Inkjet vs. Laser
- Inkjet printers: Let the sheet rest flat for 30 seconds after printing before you pick it up. Inkjet ink is wet and smears on cardstock if you stack the sheets immediately.
- Laser printers: No drying time needed. Colors tend to be slightly more vivid and water-resistant than inkjet.
Color Accuracy
If your printed color looks much darker or more saturated than the preview, your printer’s color profile may be adding contrast. Most printers have a “Vivid” or “Enhanced” color mode that over-processes colors. Switching to “Standard” or “Natural” usually matches the screen more closely.
Cutting and Finishing Your Printable Gift Tags
Cutting Cleanly
A guillotine paper cutter gives straight, clean cuts in one motion. If you only have scissors, mark your cut lines lightly with a pencil and ruler first — freehand cutting on cardstock almost always drifts.
For circle, heart, and star shapes, cut roughly 2–3 mm outside the printed shape edge. This gives you a white border that actually looks intentional and makes the shape stand out more than cutting right to the edge.
Punching the Ribbon Hole
If you enabled the ribbon hole marker, there’s a small dot at the top of each tag. Place your hole punch over the dot and punch cleanly. Center the dot in the hole punch opening before squeezing — off-center holes on circles or hearts look unfinished.
For rectangle and rounded tags: punch the hole about 8–10 mm from the top edge, centered left-to-right.
Threading the Ribbon
Satin ribbon (3–5 mm wide) threads easily and stays tied. For a more rustic look, 2 mm natural twine works well with kraft paper or neutral-colored tags. Cut the ribbon at least 25 cm long so you have enough to tie a proper bow after looping through the hole.
Printable Gift Tag Ideas by Occasion
Birthday Bright, warm colors work best. Try a star or heart shape with a short message like “Happy Birthday!” in the message field. A festive style adds subtle dot accents that read as celebratory without being overwhelming.
Christmas and Holiday Classic red, deep green, or gold backgrounds. Rectangle or rounded shapes fit the most text — useful if you want to include both a name and a line like “Wishing you a wonderful holiday.”
Wedding Favors Oval or circle shapes in blush, ivory, or sage. Keep text minimal (just the couple’s names or a date) and use the Minimal style for the cleanest look. Print on white cardstock to keep colors accurate.
Baby Shower Pastel blue, mint, lavender, or yellow. Circle or rounded shapes. A short message like “With love for Baby [name]” fits nicely.
Thank You Tags Heart shape in a neutral color (dusty rose, warm grey, deep teal). Minimal style. Just “Thank You” as the main text and your name in the From field.
Frequently Asked Questions
Are PrintMigo’s gift tags really free with no watermark? Yes. You don’t need an account and basic PDF downloads have no watermarks. The service is supported by display ads on the page.
What paper size does the PDF use? The generator creates A4 PDFs. If you’re in North America and printing on US Letter, select “Fit to page” or “Scale to fit” in your printer dialog — the tags will size down slightly (about 3%) but remain fully usable.
Can I print the tags in black and white? Yes. If you set the background to white or a very light grey and print in grayscale, the tags work fine. The text will still be clearly readable.
How do I get the ribbon hole without a printed dot? You can toggle the ribbon hole marker off and punch the hole yourself. For rectangles and rounded shapes, center the hole 8–10 mm from the top edge. For circles, punch at the 12 o’clock position.
Can I use these gift tags for products I sell? Tags generated with your own custom text are yours to use for personal and small commercial purposes, such as tagging handmade products. See the Terms of Service for full details.
How many gift tags can I print per page? The generator supports 4, 6, 8, or 12 tags per A4 sheet. Six per page gives a good balance of tag size and economy.
Ready to make your first set? The free gift tag generator is open now — no account, no download, no waiting.