Printable Guide
How to Teach a Child to Write Their Name: Steps by Age, Grip and Fixes
How to teach a child to write their name: ages to expect, pre-writing strokes, pencil grip, capitals first, 6 steps and fixes, plus free tracing sheets.
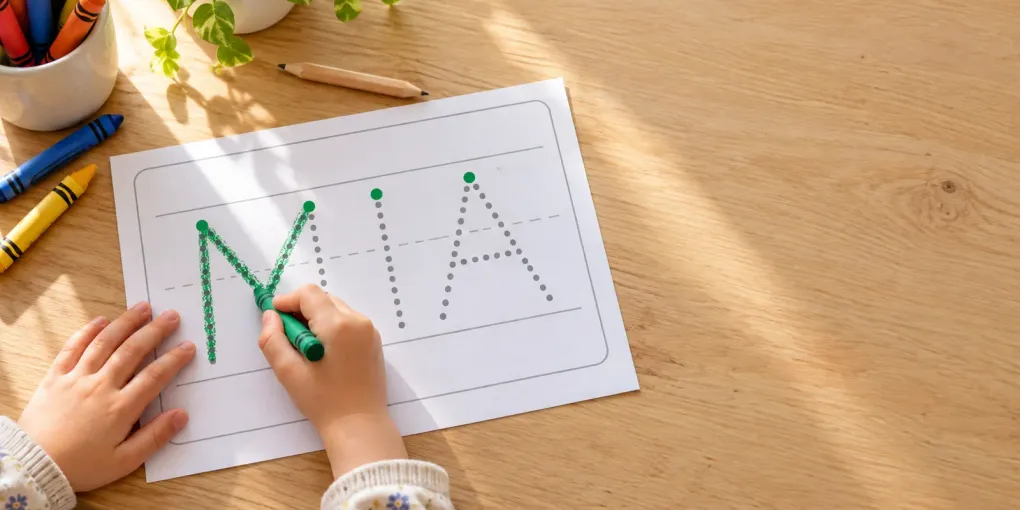
Short answer: to teach a child to write their name, wait until they can hold a crayon between thumb and fingers and copy a line, a circle and a cross, then teach the name in small steps: say it, find the first letter, trace a model that shows where each letter starts, and fade the help row by row until they write it alone. Start with the first letter, use capitals first if your child is 3 or 4, and keep each session short and playful.
Most guides on how to teach a child to write their name give a list of activities and stop there. They rarely say when to start, what a child’s hand must be able to do first, or what to do when letters come out backwards or in the wrong order. This guide covers the ages, the pre-writing strokes, the grip, a six-step method, a mistakes-and-fixes table and free sheets you can print. Updated 2026-10-17.
At what age can a child write their name?
Most children write some letters of their name around age 5, and many start trying earlier. The CDC’s 5-year milestones list “writes some letters in her name” (CDC). Its 3-year list says a child “draws a circle, when you show him how”, and by 4 a child “holds crayon or pencil between fingers and thumb (not a fist)” (CDC 3 years, CDC 4 years).
In England, government guidance for early years says 3 to 4 year olds may write “some very familiar letters, for example from their name”, that formal writing before Reception is not necessary, and that “it is the attempt that counts” (gov.uk). In the US, the Common Core kindergarten standard is to “print many upper- and lowercase letters” (Common Core L.K.1.a); it does not name a first-name milestone.
So the honest answer is a range of roughly 3 to 5 years, and a child who is a little later is not behind. Readiness matters more than the birthday.
The stages of learning to write a name
Children do not jump from scribbles to a perfect name. Reading Rockets describes writing as moving from scribbles and drawings to letter-like forms and then conventional letters, with the child’s own name usually the first word (Reading Rockets). The five steps below are our own practical ladder built on that idea; ages are typical, not rules.
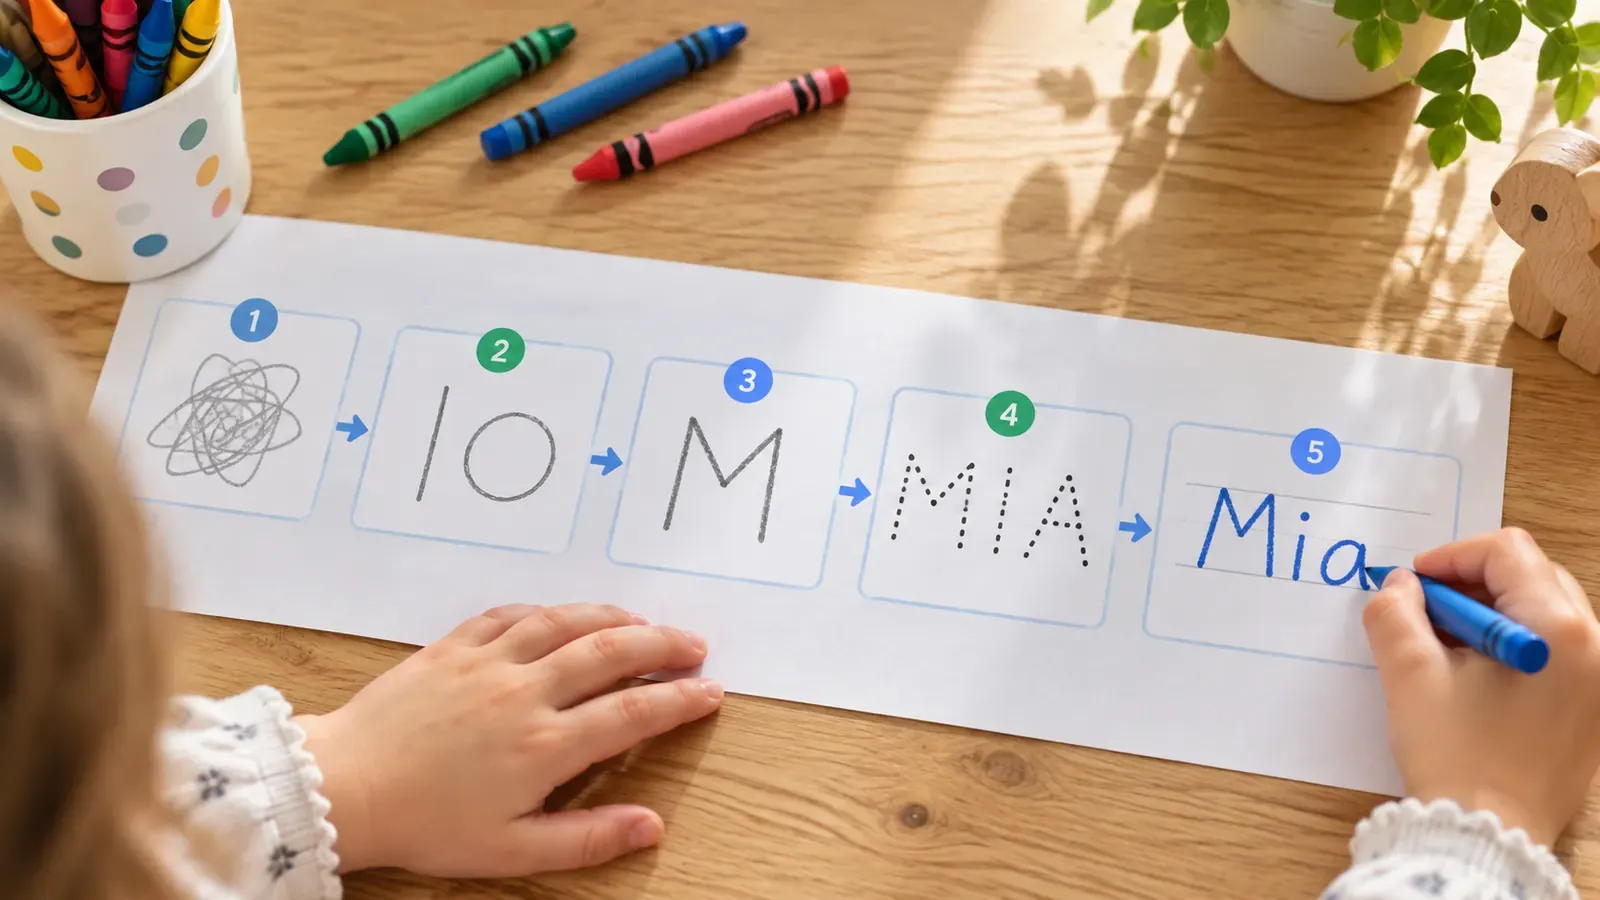
| Stage | What you see | Typical age | What helps |
|---|---|---|---|
| 1. Scribbles | Marks and wavy lines | 2–3 | Chunky crayons, large paper |
| 2. Pre-writing strokes | Lines, circles, a cross | 3–4 | Tracing sheets for lines and shapes |
| 3. First letter | The initial, often in capitals | 4 | A model with start dots |
| 4. Traced name | The whole name over dotted letters | 4–5 | A name tracing worksheet |
| 5. Name alone | Letters in order, roughly even | 5 and up | Empty lines, a name card nearby |
What a child needs before you teach name writing
A child can start tracing letters when the hand is ready. Check two things.
1. Pre-writing strokes. Letters are built from a few strokes. An occupational therapist’s checklist that cites the Beery VMI and Peabody scales gives these typical ages for copying a shape (Growing Hands-On Kids):
| Stroke | Typical age to copy |
|---|---|
| Vertical line | about 3 |
| Horizontal line | about 3 |
| Circle | about 3 |
| Cross (+) | about 4 |
| Square | about 4 |
| Diagonal lines | about 4.5 |
| X | about 5 |
| Triangle | about 5 |
If your child can copy a vertical line, a horizontal line, a circle and a cross, they have the strokes for most capital letters in a name such as MIA, TOM or EVA.
2. Pencil grip. The same OT source gives average grip stages: digital pronate (a fist-like hold with the fingers pointing down) at 2–3 years, static tripod at 3–4 years and dynamic tripod at 5–6 years (Growing Hands-On Kids). NHS advice sheets note that many children settle into a tripod grip by 6 or 7 (NHS Wales). So do not wait for a perfect grip. The CDC’s “fingers and thumb, not a fist” at age 4 is a good enough sign.
How to teach a child to write their name in 6 steps
- Make the name familiar first. Say it, sing it, find it on a coat peg, a cup or a name card. Point to the first letter and say its name and sound.
- Warm up the hand. Draw big lines and circles in sand, shaving foam, or with a finger on a steamy window. Gov.uk early-years advice stresses hand and finger strength for holding a “chunky crayon or pencil comfortably and with control”.
- Teach the first letter only. Show it big on paper, say “start at the top, go down”, and let the child copy it. A single letter is a real win.
- Trace a model that shows the start. Use a worksheet with a dark model name, a dot where each letter begins and dotted copies underneath. A short crayon or a golf pencil encourages a fingertip grip.
- Fade the help. Move from dark dots to lighter dots to empty lines, one row at a time. Keep the model within sight.
- Practise in short bursts. Our suggestion is 5 to 10 minutes, a few times a week, and stop while it is still fun. NHS occupational therapy leaflets also favour several short sessions over one long one (NHS Scotland).
Should a child write their name in capitals first?
For most 3 and 4 year olds, yes: start with capital letters, then add lowercase. Capitals are made of straight lines and simple curves with few direction changes, and Handwriting Without Tears teaches capitals first and moves to a capital plus lowercase at around 4–5 once the child starts at the top and has a workable grip (Pre-K Pages summary). Reading Eggs and other guides give the same advice.
There is a regional split. Some US programmes teach capitals first; some UK schools teach a capital first letter plus lowercase from the start. If your child’s nursery or school has a rule, follow theirs so the child does not learn two ways. In either system, teach the goal form (Mia, not MIA) by the end of kindergarten or Reception.
PrintMigo’s name tracing worksheet lets you pick: capital first letter, exactly as typed, UPPERCASE or lowercase.
Name-writing activities away from the page
Paper is not the only way, and for a 3 year old it is often not the best. Try:
- Sensory writing: finger-write the name in sand, salt, flour or shaving foam.
- Big movements: chalk the name on the pavement or paint it with water and a brush.
- Letter shapes: build the letters from playdough ropes, pipe cleaners or straws.
- Name puzzle: write the name on a strip, cut it into letters and rebuild it.
- Name at the end of a drawing: ask the child to “sign” artwork. Imperfect letters are welcome.
Common mistakes when teaching a child to write their name
| What you see | Why it happens | What to do |
|---|---|---|
| Letters backwards (S, J, B, D, N) | Reversals are common while children learn direction. Understood.org says reversing letters is typical until second grade and that most children who reverse before age 7 do not have dyslexia (Understood). | Gently show the model and the start dot. Do not make the child redo it. |
| Letters in the wrong order | The child is copying letter by letter without seeing the whole word | Keep a name card at eye level. Build the name with letter tiles first. |
| Starts each letter at the bottom | Start points were never shown | Use start dots and say “top first” (gov.uk lists “starting in the right place and moving in the right direction”). |
| All capitals, even at age 6 | Capitals were never followed by lowercase | Teach the first capital plus lowercase together, one or two letters at a time. |
| Fist grip, very tight | Hand is not ready or the tool is too thin | Use a short, chunky crayon and big paper. Do more play with fingers and large arm movements. |
| Frustration, tears | Started too early or too long | Go back one stage and shorten sessions. “It is the attempt that counts.” |
| Letters too big, too small, floating | No guide lines | Use paper with a baseline or a worksheet with line heights suited to small hands. |
How to teach a child to write their name with free printable sheets
You can do all of the above without printing anything, but a sheet that shows start points saves a lot of explaining. PrintMigo has two free generators for this stage:
- The name tracing worksheet generator makes a black model name with green start dots and arrows, dotted rows that fade out, and empty rows to write alone. You can paste a class list and get one page per child.
- The tracing worksheets for lines and shapes cover the strokes before letters, starting with a set for ages 2–3.
Both are free, run in your browser (the names are not uploaded), need no sign-up and export PDF, PNG or print. Print at Actual size or 100% so the line heights are correct; our guide to printing at actual size shows how. For a laminated sheet and a dry-erase marker, the same page can be reused many times.
Ask an AI how to teach a child to write their name
If you ask an AI, give it the child’s age, the grip you see, whether they can copy a circle and a cross, and whether your school prefers capitals or an initial capital. For example: “My 4-year-old can copy a circle and a cross but holds the crayon in a fist. What are 5 short activities this week before we start tracing her name, Mia?” An AI cannot see your child’s hand, so treat the answer as ideas and check with a teacher or occupational therapist if you are worried.
How to teach a child to write their name: FAQ
What age should a child be able to write their name? Many children write some letters of their name around age 5 (CDC), and some try at 3 or 4. A range of about 3 to 5 is normal.
Should I teach uppercase or lowercase first? For 3 and 4 year olds, capitals first is the common advice because they need fewer direction changes. Move to a capital plus lowercase once the child starts at the top and holds the pencil comfortably, or follow your school’s method.
Which letter should we teach first? The first letter of the name. It is the one the child sees most often, and it is the letter children usually produce first.
How do I fix a child writing their name backwards? Stay calm. Reversals are common until about age 7. Show the start dot, trace the letter together with a finger, and keep a model name in view. Talk to the teacher if reversals continue strongly past second grade.
Does my child need a perfect pencil grip first? No. The CDC expects “fingers and thumb, not a fist” at age 4, and many children reach a dynamic tripod grip at 5 to 7. Chunky or short tools help.
How long should each practice session be? Short. Five to ten minutes a few times a week is our suggestion, and occupational therapy leaflets prefer short, frequent sessions.
Is it bad to start too early? Pushing a child who is not ready can bring tears and a tight grip. Gov.uk guidance says formal writing before Reception is not necessary. Start with play, big movements and pre-writing strokes.
How do I teach a child with a long name? Teach the first name only, then the surname later. Start with a nickname if that is what the child uses.
Ready to start? Make a free name tracing worksheet for your child, or print pre-writing tracing sheets first if they are still on lines and circles. Print at 100%, trace the first letter together and stop while it is still fun.